A question that pops up for many DSP-ers working with IIR and FIR filters, I think, is how to look at a filter’s frequency and phase response. For many, maybe they’ve calculated filter coefficients with something like the biquad calculator on this site, or maybe they’ve used a MATLAB, Octave, Python (with the scipy library) and functions like freqz to compute and plot responses. But what if you want to code your own, perhaps to plot within a plugin written in c++?
You can find methods of calculating biquads, for instance, but here we’ll discuss a general solution. Fortunately, the general solution is easier to understand than starting with an equation that may have been optimized for a specific task, such as plotting biquad response.
Plotting an impulse response
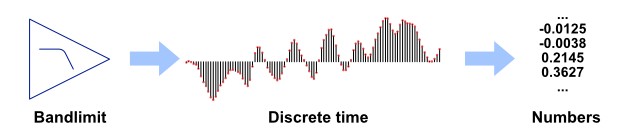
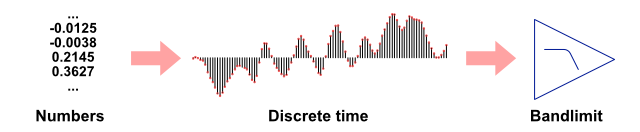
One way we could approach it is to plot the impulse response of the filter. That works for any linear, time-invariant process, and a fixed filter qualifies. One problem is that we don’t know how long the impulse response might be, for an arbitrary filter. IIR (Infinite Impulse Response) filters can have a very long impulse response, as the name implies. We can feed a 1.0 sample followed by 0.0 samples to obtain the impulse response of the filter. While we don’t know how long it will be, we could take a long impulse response, perhaps windowing it, use an FFT to convert it to the frequency domain, and get a pretty good picture. But it’s not perfect.
For an FIR (Finite Impulse Response) filter, though, the results are precise. And the impulse response is equal to the coefficients themselves. So:
For the FIR, we simply run the coefficients through an FFT, and take the absolute value of the complex result to get the magnitude response.
(The FFT requires a power-of-2 length, so we’d need to append zeros to fill, or use a DFT. But we probably want to append zeros anyway, to get more frequency points out for our graph.)
Plotting the filter precisely
Let’s look for a more precise way to plot an arbitrary filter’s response, which might be IIR. Fortunately, if we have the filter coefficients, we have everything we need, because we have the filter’s transfer function, from which we can calculate a response for any frequency.
The transfer function of an IIR filter is given by
\(H(z)=\frac{a_{0}z^{0}+a_{1}z^{-1}+a_{2}z^{-2}…}{b_{0}z^{0}+b_{1}z^{-1}+b_{2}z^{-2}…}\)
z0 is 1, of course, as is any value raised to the power of 0. And for normalized biquads, b0 is always 1, but I’ll leave it here for generality—you’ll see why soon.
To translate that to an analog response, we substitute ejω for z, where ω is 2π*freq, with freq being the normalized frequency, or frequency/samplerate:
\(H(e^{j\omega})=\frac{a_{0}e^{0j\omega}+a_{1}e^{-1j\omega}+a_{2}e^{-2j\omega}…}{b_{0}e^{0j\omega}+b_{1}e^{-1j\omega}+b_{2}e^{-2j\omega}…}\)
Again, e0jω is simply 1.0, but left so you can see the pattern. Here it is restated using summations of an arbitrary number of poles and zeros:
\(H(e^{j\omega})=\frac{\sum_{n=0}^{N}a_{n}e^{-nj\omega}}{\sum_{m=0}^{M}b_{m}e^{-mj\omega}}\)
For any angular frequency, ω, we can solve H(ejω). A normalized frequency of 0.5 is half the sample rate, so we probably want to step it from 0 to 0.5—ω from 0 to π—for however many points we want to evaluate and plot.
Coding it
From that last equation, we can see that a single FOR loop will handle the top or the bottom coefficient sets. Here, we’ll code that into a function that can evaluate either zeros (a terms) or poles (b terms). We�’ll refer to this as our direct evaluation function, since it evaluates the coefficients directly (as opposed to evaluating an impulse response).
You’ve probably noticed the j, meaning an imaginary part of a complex number—the output will be complex. That’s OK, the output of an FFT is complex too, and we know how to get magnitude and phase from it already.
Some languages support complex arithmetic, and have no problem evaluating “e**(-2*j*0.5)”—either directly, or with an “exp” (exponential) function. It’s pretty easy in Python, for instance. (Something like, coef[idx] * math.e**(-idx * w * 1j), as the variable idx steps through the coefficients array.)
For languages that don’t, we can use Euler’s formula, ejx = cos(x) + j * sin(x); that is, the real part is the cosine of the argument, and the imaginary part is the sine of it.
(Remember, j is the same as i—electrical engineers already used i to symbolize current, so they diverged from physicists and used j. Computer programming often use j, maybe because i is a commonly used index variable.)
So, we create our function, run it on the numerator coefficients for a given frequency, run it again on the denominator coefficients, and divide the two. The result will be complex—taking the absolute value gives us the magnitude response at that frequency.
Revisiting the FIR
Since we already had a precise method of looking at FIR response via the FFT/DFT, let’s compare the two methods to see how similar they are.
To use our new method for the case of an FIR, we note that the denominator is simply 1, so there is no denominator to evaluate, no need for division. So:
For the FIR, we simply run the coefficients through our evaluation function, and take the absolute value of the complex result to get the magnitude response.
Does that sound familiar? It’s the same process we outlined using the FFT.
And back to IIR
OK, we just showed that our new evaluation function and the FFT are equivalent. (There is a difference—our evaluation function can check the response at an arbitrary frequency, whereas the FFT frequency spacing is defined by the FFT size, but we’ll set that aside for the moment. For a given frequency, the two produce identical results.)
Now, if the direct evaluation function and the FFT give the same results, for the same frequency point, and the numerator and denominator are evaluated by the same function, by extension we could also get a precise evaluation by substituting an FFT process for both the numerator and denominator, and dividing the two as before. Note that we’re no longer talking about the FFT of the impulse response, but the coefficients themselves. That means we no longer have the problem of getting the response of an impulse that can ring out for an unknown time—we have a known number of coefficients to run through the FFT.
Which is better?
In general, the answer is our direct evaluation method. Why? We can decide exactly where we want to evaluate each point. That means that we can just as easily plot with log frequency as we can linear.
But, there may be times that the FFT is more suitable—it is extremely efficient for power-of-2 lengths. (And don’t forget that we can use a real FFT—the upper half of the general FFT results would mirror the lower half and not be needed.)
An implementation
We probably want to evaluate ω from 0 to π, corresponding to a range of half the sample rate. So, we’d call the evaluation function with the numerator coefficients and with the denominator coefficients, for every ω that we want to know (spacing can be linear or log), and divide the two. For frequency response, we’d take the absolute value (equivalently, the square root of the sum of the squared real and imaginary parts) of each complex result to obtain magnitude, and arc tangent of the imaginary part divided by the real part (specifically, we use the atan2 function, which takes into account quadrants). Note that this is the same conversion we use for FFT results, as you can see in my article, A gentle introduction to the FFT.
\(magnitude:=\left |H \right |=abs(H)=\sqrt{H.real^2+H.imag^2}\)
\(phase := atan2(H.imag,H.real)\)
For now, I’ll leave you with some Python code, as it’s cleaner and leaner than a C or C++ implementation. It will make it easier to transfer to any language you might want (Python can be quite compact and elegant—I’m going for easy to understand and translate with this code). Here’s the direct evaluation routine corresponding to the summation part of the equation (you’ll also need to “import numpy” to have e available—also available in the math library, but we’ll use numpy later, so we’ll stick with numpy alone):
import numpy as np

# direct evaluation of coefficients at a given angular frequency
def coefsEval(coefs, w):
    res = 0
    idx = 0
    for x in coefs:
        res += x * np.e**(-idx * 1j * w)
        idx += 1
    return res
Again, we call this with the coefficients for each frequency of interest. Once for the numerator coefficients (the a coefficients on this website, corresponding to zeros), once for the denominator coefficients (b, for the poles—and don’t forget that if there is no b0, the case for a normalized filter, insert a 1.0 in its place). Divide the first result by the second. Use use abs (or equivalent) for magnitude and atan2 for phase on the result. Repeat for every frequency of interest.
Here’s a python function that evaluates numerator and denominator coefficients at an arbitrary number of points from 0 to π radians, with equal spacing, returning arrays of magnitude (in dB) and phase (in radian, between +/- π):
# filter response, evaluated at numPoints from 0-pi, inclusive
def filterEval(zeros, poles, numPoints):
    magdB = np.empty(0)
    phase = np.empty(0)
    for jdx in range(0, numPoints):
        w = jdx * math.pi / (numPoints - 1)
        resZeros = coefsEval(zeros, w)
        resPoles = coefsEval(poles, w)

        # output magnitude in dB, phase in radians
        Hw = resZeros / resPoles
        mag = abs(Hw)
        if mag == 0:
            mag = 0.0000000001  # limit to -200 dB for log
        magdB = np.append(magdB, 20 * np.log10(mag))
        phase = np.append(phase, math.atan2(Hw.imag, Hw.real))
    return (magdB, phase)
Here’s an example of evaluating biquad coefficients at 64 evenly spaced frequencies from 0 Hz to half the sample rate (these coefficients are right out of the biquad calculator on this website—don’t forget to include b0 = 1.0):
zeros = [ 0.2513643668578741, 0.5027287337157482, 0.2513643668578741 ]
poles = [ 1.0, -0.17123074520885395, 0.1766882126403502 ]

(magdB, phase) = filterEval(zeros, poles, 64)

print("\nMagnitude:\n")
for x in magdB:
    print(x)

print("\nPhase:\n")
for x in phase:
    print(x)
Next up, a javascript widget to plot magnitude and phase of arbitrary filter coefficients.
Extra credit
The direct evaluation function performs a Fourier analysis at a frequency of interest. For better understanding, reconcile it with the discrete Fourier transform described in A gentle introduction to the FFT. In that article, I describe probing the signal with cosine and sine waves to obtain the response at a given frequency. Look again at Euler’s formula, which shows that ejω is cosine (real part) and sine (imaginary part), which the article alludes to this under the section “Getting complex”. You should understand that the direct evaluation function presented here could be used to produce a DFT (given complete evaluation of the signals at appropriately spaced frequencies). The main difference is that for this analysis, we need not do a complete and reversible transform—we need only analyze frequency response values that we want to graph.